How to photograph the Northern Lights
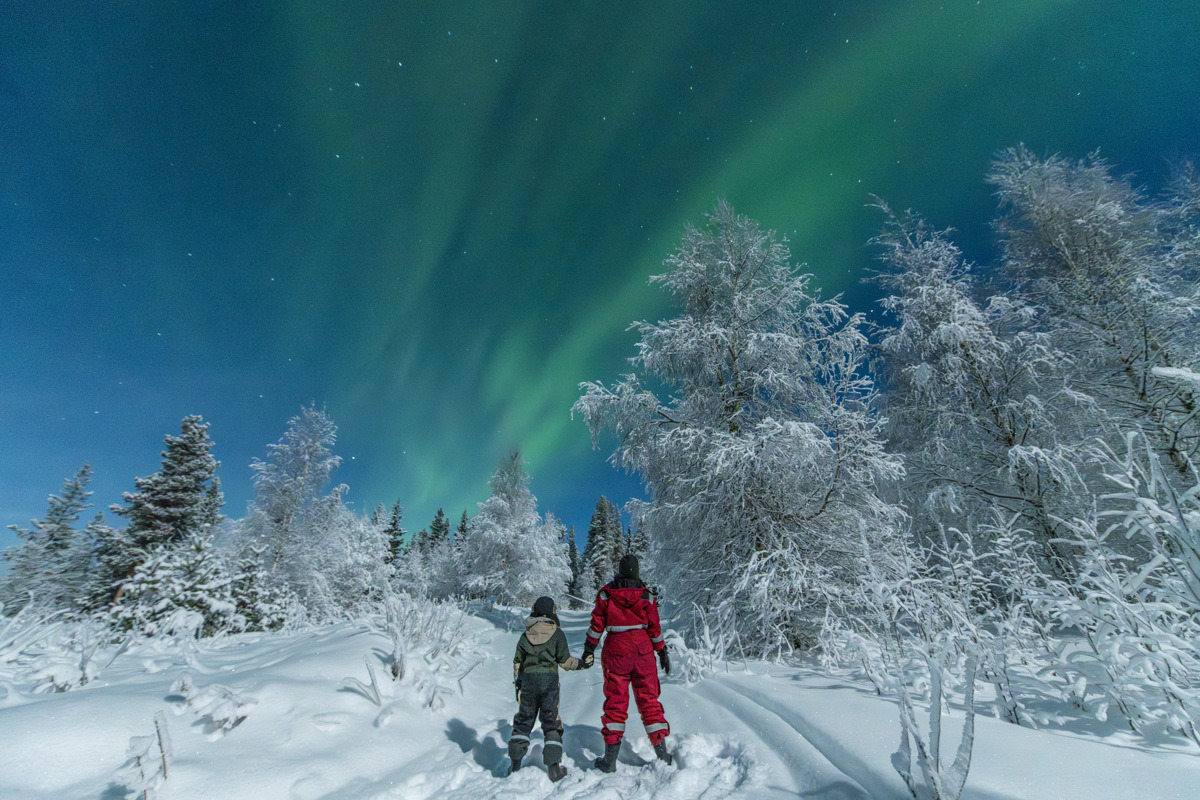
So, you’ve found your spot, checked the weather and dressed warmly. But how do you actually capture the Northern Lights? Photographing auroras can be tricky. It’s dark, often freezing, and the lights can appear and vanish without warning. Here are a few practical tips to help you increase your chances of getting that perfect shot.
Wear two pairs of gloves
Use a thick pair to keep your hands warm and a thinner pair underneath that allows you to handle your camera or phone without removing them.
Use a tripod
Shooting the Northern Lights often requires a long shutter speed, so keeping your camera steady is essential. A tripod is ideal, but a rock or car roof can also work in a pinch.
Set a timer or use a remote
Even the lightest touch can blur a long-exposure shot. Use your camera’s timer or a remote shutter release to avoid camera shake.
Avoid condensation
Moving your gear between warm indoor air and the cold outdoors can cause condensation on the lens. Place your camera in a waterproof bag inside your camera bag while transitioning. If you’re only stepping indoors briefly, keep the camera bag closed so your gear doesn’t have time to warm up.
Bring a spare battery
Cold weather drains batteries quickly. Carry a fully charged spare and keep it close to your body to keep it warm.
Camera settings
The best camera settings depend on your equipment, location and the conditions on the night, but these general guidelines are a good place to start. Shoot in RAW format if possible to give you more flexibility when editing.
- ISO: Start at ISO 800. If it’s very dark, increase to 1600 or even 3200.
- Shutter speed: Start at around 5–15 seconds. Use a shorter exposure for bright, fast-moving auroras and a longer one if the lights are faint and moving slowly.
- Aperture: Use the lowest f-number your lens allows – ideally f/2.8 or lower.
- Focus: Switch to manual focus. Try focusing on a distant star or the moon, or set the focus to infinity.
If you’re unsure, many guided Northern Lights tours are led by photographers who can help you find the right settings on the night. For time-lapse photography, set your white balance manually to keep the tone consistent across your images.
Photographing the Northern Lights with a smartphone
Many modern smartphones can capture the Northern Lights, especially when the aurora is bright and the sky is clear. Keeping your phone steady is key.
- Use night mode: If your phone has a night mode, switch it on to capture more light.
- Keep your phone steady: Use a tripod or prop your phone against a stable surface. A timer or remote shutter can also help avoid camera shake.
- Turn off the flash: It won’t help you capture the aurora and can unnecessarily light the foreground.
- Try manual settings: If your camera app offers manual or Pro controls, experiment with exposure time and ISO. Start with a few seconds’ exposure and adjust according to how bright and fast-moving the aurora is.
- Check the focus: Tap on the sky or a distant light to help your camera focus. If your phone offers manual focus, set it towards infinity.
- Shoot in RAW if available: This gives you more flexibility when editing your photos.
- Carry a power bank: Cold temperatures drain phone batteries quickly, so bring a fully charged power bank.
Good luck!